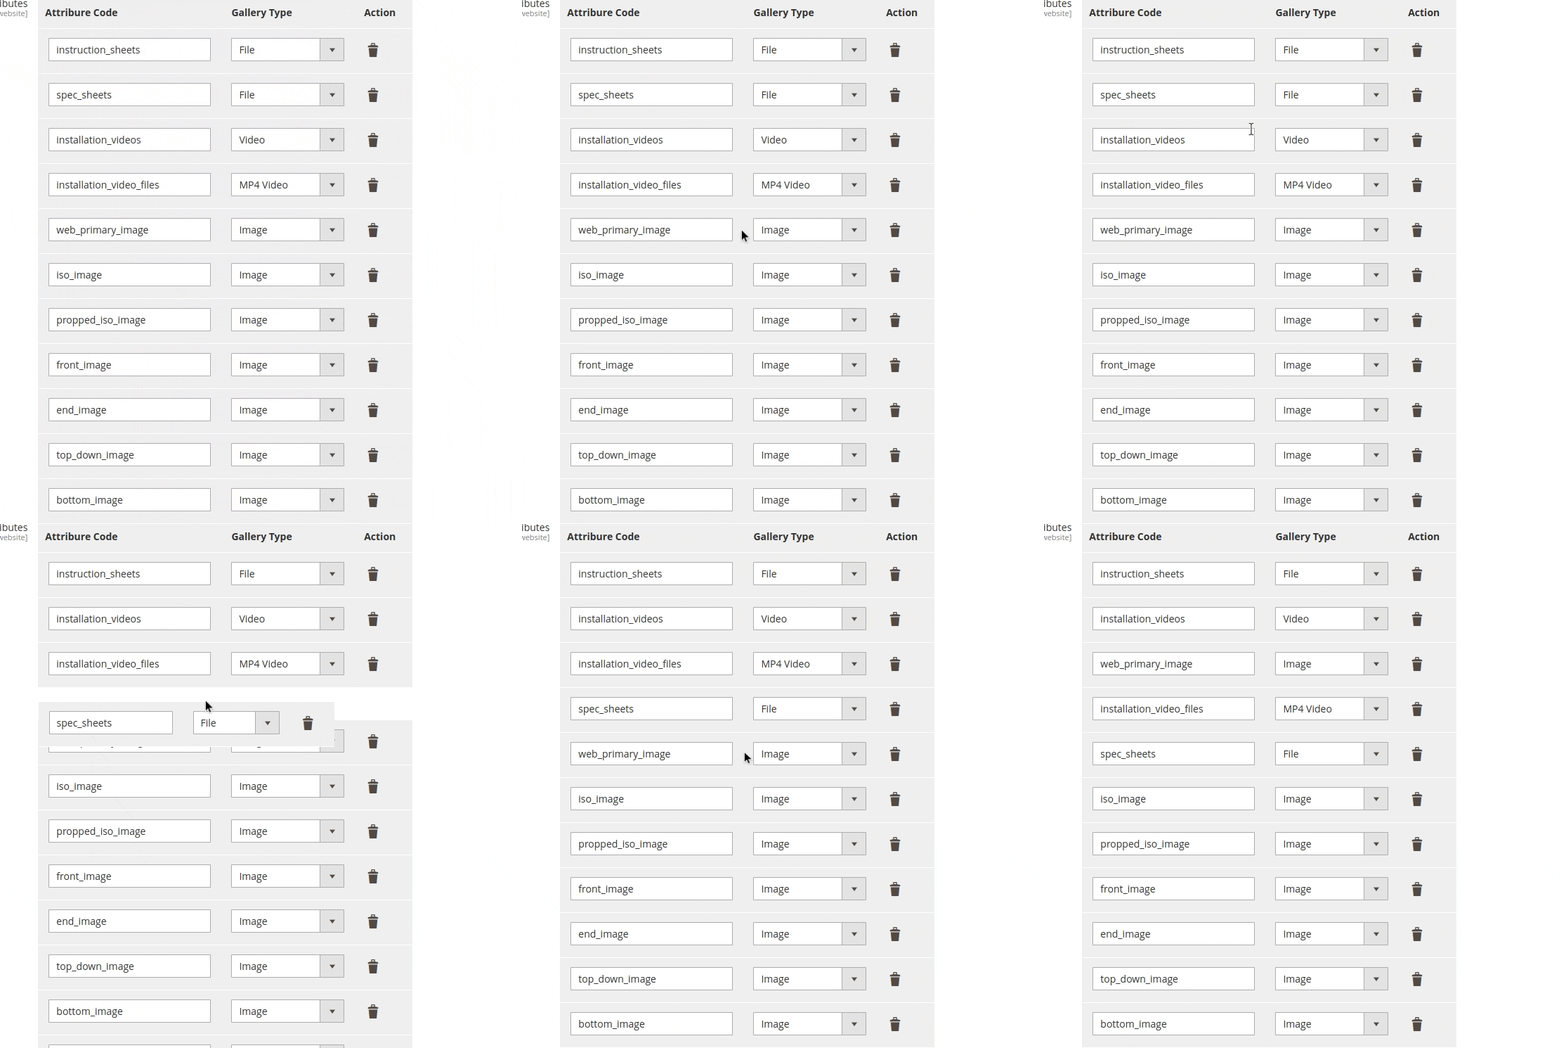
In this guide, I’ll show you how to set up draggable dynamic rows in Magento 2 system configuration using the Magento default javascript component.
System configurations are crucial for enhancing customization and flexibility in Magento 2. Often, developers want to make configurations more interactive by adding draggable, dynamic rows. This feature can improve user experience by allowing easy rearrangement of rows in the admin configuration, making it ideal for managing lists, priority settings, or order-sensitive items.
Why Use Draggable Dynamic Rows?
Dynamic, draggable rows allow administrators to:
- Reorder items effortlessly by dragging and dropping rows.
- Add, remove, or rearrange settings on the fly.
- Offer a more intuitive experience for managing configuration data that has a clear order or hierarchy.
Step 1: Create dynamic rows-based system configuration
To add draggable rows, let’s first create a module that will add dynamic configuration as per your requirement. If you haven’t created dynamic rows based system configuration,
Follow this easy and quick tutorial:
https://www.rohanhapani.com/how-to-add-dynamic-rows-in-system-configuration-in-magento-2/
Step 2: Find the frontend model to create draggable dynamic rows
You can find the class of the frontend model for your dynamic system configuration from the system.xml.
For Example :
<frontend_model>Jigar\DynamicRowsExample\Block\Adminhtml\DynamicFieldData</frontend_model>
Step 3: Adding JavaScript for Draggable Rows
Open frontend_model file and add the below method :
We use JavaScript to add drag-and-drop functionality to the rows within this configuration. Magento 2 requires requirejs for loading external JavaScript, and we add a sortable script to make rows draggable.
/**
     * Get the element HTML
     *
     * @param \Magento\Framework\Data\Form\Element\AbstractElement $element
     * @return string
     */
    protected function _getElementHtml(\Magento\Framework\Data\Form\Element\AbstractElement $element)
    {
        $html = parent::_getElementHtml($element);
        $script = '<script>
                document.addEventListener("DOMContentLoaded", function(event) {
                    require([
                        \'jquery\',
                        \'Magento_Theme/js/sortable\'
                    ], function ($) {
                        setTimeout(function () {
                            $(\'#your_configuration_id_here\').sortable({
                                containment: "parent",
                                items: \'tr\',
                                tolerance: \'pointer\',
                            });
                        }, 1000);
                    });
                });
            </script>';
        $html .= $script;
        return $html;
    }
}
Here’s what this JavaScript block does:
- DOMContentLoaded: Ensures the script runs only after the page loads.
- Sortable: Initializes jQuery’s sortable function to make each row draggable within the table.
The sortable function contains options for:
containment: Restricting the drag area within the parent container.items: Settingtras the draggable element.tolerance: Configuring drag behavior when hovering over elements.
Don’t forget to change the #your_configuration_id_here with the actual one, you can find it by inspecting your dynamic row configuration in the backend and finding this ID.
You should see the fields with dynamic rows that can be added, deleted, and dragged to reorder.
For reference, I’m attaching my full frontend model file below.
<?php
declare(strict_types=1);
namespace Jigar\DynamicRowsExample\Block\Adminhtml\Form;
use Magento\Config\Block\System\Config\Form\Field\FieldArray\AbstractFieldArray;
use Magento\Framework\DataObject;
use Magento\Framework\Exception\LocalizedException;
use Jigar\DynamicRowsExample\Block\Adminhtml\Form\GalleryType;
/**
 * Class Ranges
 */
class LeftSection extends AbstractFieldArray
{
    /**
     * @var TaxColumn
     */
    private $sectionRenderer;
    /**
     * Prepare rendering the new field by adding all the needed columns
     */
    protected function _prepareToRender()
    {
        $this->addColumn('attribute', ['label' => __('Attribure Code'), 'class' => 'required-entry']);
        $this->addColumn('section', [
            'label' => __('Gallery Type'),
            'renderer' => $this->getSection()
        ]);
        $this->_addAfter = false;
        $this->_addButtonLabel = __('Add');
    }
    /**
     * Prepare existing row data object
     *
     * @param DataObject $row
     * @throws LocalizedException
     */
    protected function _prepareArrayRow(DataObject $row): void
    {
        $options = [];
        $section = $row->getSection();
        if ($section !== null) {
            $options['option_' . $this->getSection()->calcOptionHash($section)] = 'selected="selected"';
        }
        $row->setData('option_extra_attrs', $options);
    }
    /**
     * Get Section
     *
     * @return TaxColumn
     * @throws LocalizedException
     */
    private function getSection()
    {
        if (!$this->sectionRenderer) {
            $this->sectionRenderer = $this->getLayout()->createBlock(
                GalleryType::class,
                '',
                ['data' => ['is_render_to_js_template' => true]]
            );
        }
        return $this->sectionRenderer;
    }
    /**
     * Get the element HTML
     *
     * @param \Magento\Framework\Data\Form\Element\AbstractElement $element
     * @return string
     */
    protected function _getElementHtml(\Magento\Framework\Data\Form\Element\AbstractElement $element)
    {
        $html = parent::_getElementHtml($element);
        $script = '<script>
                document.addEventListener("DOMContentLoaded", function(event) {
                    require([
                        \'jquery\',
                        \'Magento_Theme/js/sortable\'
                    ], function ($) {
                        setTimeout(function () {
                            $(\'#catalogWebsites_left_section_left_rows\').sortable({
                                containment: "parent",
                                items: \'tr\',
                                tolerance: \'pointer\',
                            });
                        }, 1000);
                    });
                });
            </script>';
        $html .= $script;
        return $html;
    }
}
Step 4: Testing and Verifying
Clear Cache: Run php bin/magento cache:clean to ensure the latest changes appear in the admin.
Admin Configuration: Navigate to your custom system configuration section. You should see the fields with dynamic rows that can be added, deleted, and dragged to reorder.

Conclusion
Using draggable, dynamic rows in Magento 2’s admin configuration not only improves functionality but also provides a more intuitive admin experience. The sortable JavaScript functionality combined with Magento’s AbstractFieldArray makes it easy to implement this feature.
This solution is highly customizable and can be extended further to include validation, dynamic data loading, and AJAX updates. Experiment with these features to create a more powerful admin experience in Magento 2.
Let me know if you have any questions, or leave a comment below if this guide helps you. Happy coding!
Thanks…
You may also like,
How to Update Shipping Methods in Magento 2 Using JavaScript?
How to Remove a Link from the Customer Account Menu in Magento 2?


This is so great, now i we can get the data as required by setting rows.