In this blog, we’ll walk you through the process of enabling maintenance mode in Magento 2, ensuring a seamless experience for both you and your customers.
Maintaining your Magento 2 store is crucial to ensure it runs smoothly and efficiently. Whether you’re updating the system, installing new extensions, or fixing bugs, it’s essential to place your site in maintenance mode to prevent visitors from encountering errors.
What is Maintenance Mode in Magento 2?
Maintenance mode is a feature in Magento 2 that allows you to temporarily take your store offline while performing updates or maintenance tasks. When enabled, visitors will see a customizable maintenance page, while you and your team can still access the backend to work on the site.
Why Should You Use Maintenance Mode?
Using maintenance mode is essential for preventing customers from encountering errors, broken pages, or incomplete transactions during updates. It provides a controlled environment where you can work on the site without impacting the user experience.
How to Enable Maintenance Mode in Magento 2?
Step 1: Access Your Magento 2 Root Directory
To enable maintenance mode, you’ll need to access the Magento 2 root directory via SSH or FTP. If you’re using SSH, connect to your server using a terminal and navigate to the root directory of your Magento 2 installation.
cd /path/to/magento/rootStep 2: Enable Maintenance Mode
Once you’re in the root directory, use the following command to enable maintenance mode:
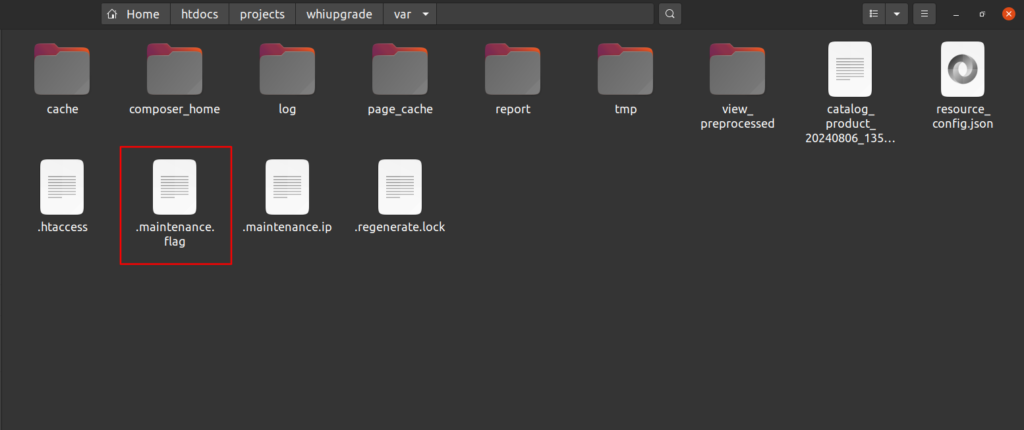
php bin/magento maintenance:enableThis command creates a .maintenance.flag file in the var directory, signaling that maintenance mode is active. (This is a hidden file)
Step 3: Verify Maintenance Mode is Enabled
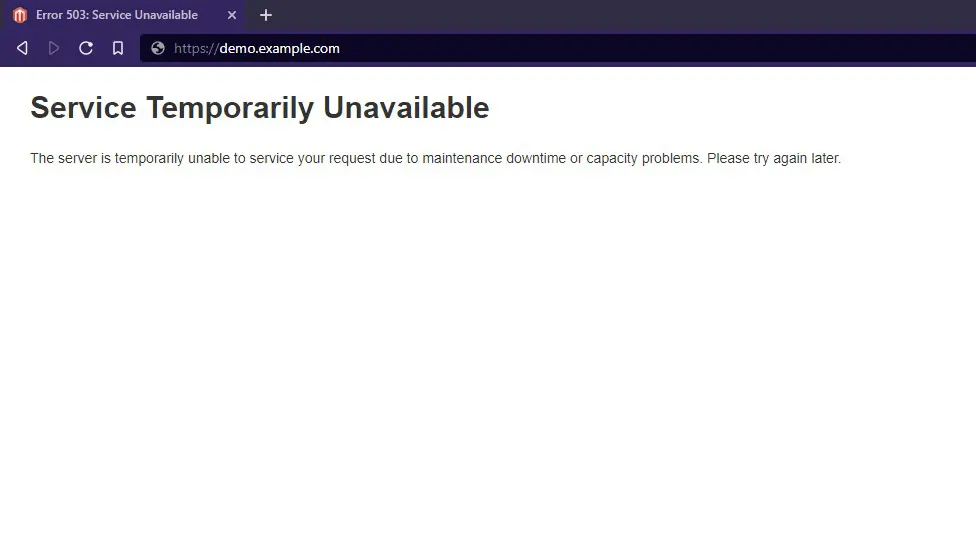
After running the command, your store will display a default maintenance page to visitors. You can verify that maintenance mode is enabled by visiting your store’s frontend.
How to Exclude Specific IP Addresses from Maintenance Mode
You may need to access the frontend for testing purposes while the site is in maintenance mode. To do this, you can exclude your IP address from maintenance mode by adding it to the var/.maintenance.ip file.
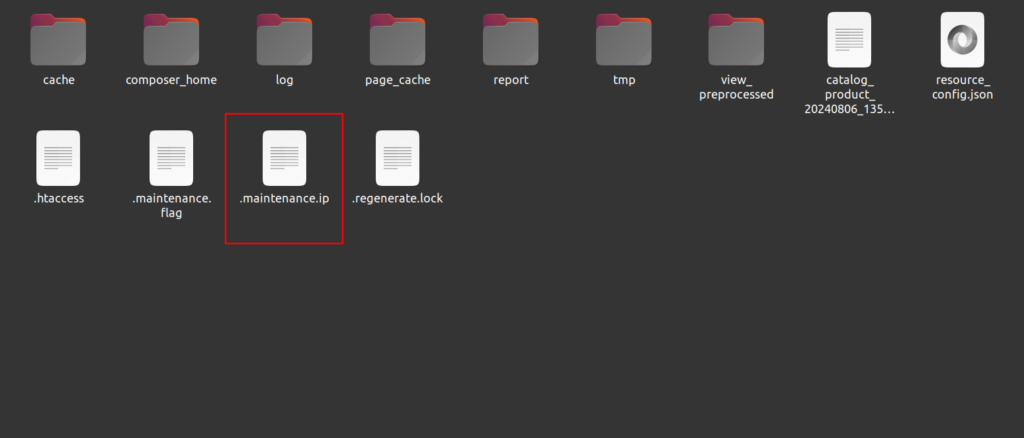
php bin/magento maintenance:allow-ips [your_IP_address]For example:
php bin/magento maintenance:allow-ips 192.168.1.1This command will allow the specified IP address to access the frontend, bypassing maintenance mode.
How to Disable Maintenance Mode
Once your maintenance tasks are complete, you can disable maintenance mode by running the following command:
php bin/magento maintenance:disableThis command removes the .maintenance.flag file, and your store will be accessible to all visitors.
If you found this guide helpful, don’t forget to share it with your fellow Magento 2 developers! For more Magento 2 tips, tricks & tutorials, subscribe to our blog and stay updated.
Reference Link :
You may also like,
How to Get Admin URL in Magento 2
How to Use ViewModel in Magento 2: A Simple Guide


Great this is very informative and helpful.
thanks !
Thank you!
Very nice explanation it is useful for the developer 🙂
Thank You Nipul!